You can find detailed instructions on technical requirements and setup of Maltego Evidence (Collaboration variant) in the file attached below.
Preparing the System
We recommend a fresh installation of Ubuntu 22.04 or 24.04 in the server version.
The Ubuntu desktop versions may cause problems. Please do not use them.
Fresh Debian installations may also work.
Please make sure you have a running machine with a fully functioning ubuntu setup. Any UI is optional, all steps of the installation will be performed via the terminal. The following conditions must be met:
- The time is synced with the time zone of the majority of your users (the server timezone is used for all SNH timestamps, e.g. reports and exports which might be used in court)
- You have sudo rights on the machine and all necessary credentials are within your reach.
- You have a free internal domain, subdomain or static IP address.
- You have SSL certificates for the domain or subdomain in a .crt + .key format (you can choose to let the installation process generate self-signed SSL certificates during the installation, but it will result in warnings on user’s machines)
- If you want to store all binary data (files, images, …) of the Maltego Evidence instance on a mounted drive make sure, that file system is available on the machine before continuing.
Preparing the Download of Installation Files
To create directories on Unix systems, you can use this command:
mkdir ~/snh-titan
cd ~/snh-titan
To obtain and unpack the necessary files, you will need unzip and wget. Please execute the following commands in the command line:
sudo apt update
sudo apt install unzip
sudo apt install wget
Downloading and Unpacking the Installation Files
The next step will be obtaining the necessary installation files. To do this, you need to execute the following command:
wget https://update.txs.maltego.com/evidence/snh2-enterprise-scripts/snh2-install-scripts.zip
After receiving the zip archive, execute the following command to unzip it into the current directory.
unzip snh2-install-scripts.zip
Importing Individual Setup Data
At this point you need the file setup_info.dat. This can be obtained from Maltego Support or your contact person for this Evidence (Collaboration) installation.
To install Maltego Evidence (Collaboration), you will need an individual setup data file called setup_info.dat. This file was provided to you by the Maltego Sales or Support Team. If not, please contact them regarding the file.
Copy the file to the directory snh-titan. Your directory will now look like this:
~/
 - snh-titan/
    - snh2-install-scripts.zip
    - install_script.sh
    - setup_info.dat
    - …
SSL-Certificates (Optional)
If you have a prepared SSL certificate and are ready to install them immediately, you need to create a folder named ssl in the working directory and copy your two files into this folder. It is important to consider the names of these files. For the key file, use cert.key and for the certificate file, use cert.crt.
If you don't have these files, you can generate them later. Just skip this step for now. If you want to use self-certified certificates, these can be generated by the installation script during the installation.
Your folder structure should look like this now:
~/
 - snh-titan/
    - snh2-install-scripts.zip
    - ssl/
        - cert.crt
        - cert.key
    - install_script.sh
    - setup_info.dat
    - …
Running the Installation Script
Execute the install_script.sh file using root privileges:
sudo chmod +x install_script.sh
sudo ./install_script.sh
or
sudo bash install_script.sh
Under no circumstances start the script with:
sudo sh install_script.sh

Configuration
To start the configuration, select option "1. Install Maltego Evidence”. Important installation and configuration data will now be downloaded. After completion, the configuration begins.
Defining an Administrator Account
First you will be asked to provide account credentials for an initial administrator’s account. Please note down the administrator credentials that you choose in a secure place such as a password vault. Otherwise, you will be locked out of the system.
Select “3. Set data” to create the administrator credentials.
 Please keep this information in a safe place. If you ever forget or lose your credentials, Maltego Support will be able to recover the account by creating a new super user account.
Defining an SMTP Mail-Server (Optional)
This step is optional. If you do not have SMTP Mail server that the Maltego Evidence Enterprise instance should use, it will still be able to send mails. These mails however will certainly land in the spam folder of your users. Therefore, we recommend providing custom mail server information.
If you already have such data, please provide it here. If you don’t need to set up a SMTP Mail Server, select “5. Skip this step”
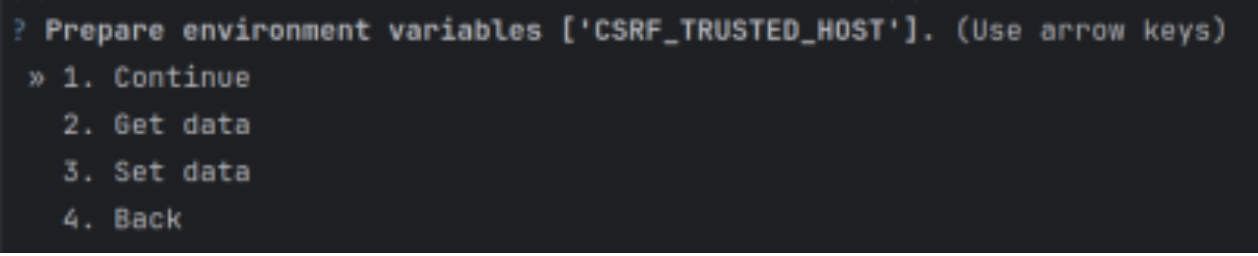
Defining the host name
You will be asked for the ‘CSRF_TRUSTED_HOST’ value. This is the host URL on which the server will be available for your users. This can either be a public URL, an internal subdomain, or an IP address. Please enter the value including ‘https://’.
Select “3. Set data” to insert a host name.

Example values are:
https://10.23.0.43
https://snh2-titan-enterprise.your-organization.com
Config database path and storage path

With "3. Set Data" you can set the paths for database and storage.
To select the default paths, first select "5. Skip this Step" and then "1. Continue".

Specifying SSL-Certificates
As one of the installation steps, you will be prompted to request SSL certificates. As mentioned earlier, there are several options for handling this. If you already have certificates and have saved them in the ssl folder, choose the first option.
If you do not currently have certificates but wish to continue with the installation and start using the application, select the No option, and in this case, self-signed certificates will be generated.
If you have certificates but forgot to place them in the required directory, choose the “Skip this step” option.
Important: Before launching the application, take the necessary actions and copy both files with the correct naming into the ssl folder!
Starting the Application

This is the final step before launching the application. This step is needed in case you need to clarify any data or as mentioned earlier, install SSL certificates.
If you have already entered all the necessary information, choose the first option “Start Maltego Evidence”.
After launching the application, you will see two information windows. The first one will display your URL, and the second one will show the Super Token, which you will need for the initial setup of Maltego Evidence. Copy this key and close the installation menu.
Please store your Super Token in a secure location. If you don't extend your licenses early enough and lose access to the super token, you run the risk of locking users out. Maltego Service hours would be required to recover that token.
If you chose “Exit” and decided to start the application afterwards, run the install_script.sh file again and skip all steps until you get to the final screen and select “Start Maltego Evidence”. Again: Note down the keys as specified.
All access data was saved in a text file by the installation script. Please put this file in a safe place and delete it from the system.
Credentials
During installation, all necessary credentials are temporarily stored in a text file. For security reasons, you should store this text file in a secure location and remove it from the system.
If you don't extend your licenses early enough and the Recovery Key is gone, you can lock yourself out. Maltego-Service hours would be required to recover the key.
~/ snh-titan/important_credentials
| Key | Value |
| DJANGO_SUPERUSER_USERNAME | Evidence Titan - Admin User |
| DJANGO_SUPERUSER_EMAIL | Evidence Titan - Admin Email |
| DJANGO_SUPERUSER_PASSWORD | Evidence Titan – Admin Password |
| PG_USER | Postgres Database User |
| PG_PASSWORD | Postgres Database Password |
| PG_DATABASE | Postgres Database Name |
| Secret_super_token | Evidence Recovery Key (See activating the installation) |
Activating the Installation
To activate Maltego Evidence, you need to open the URL of the server where the application is running, select the option "You are the system administrator? Click here to upload a license file" and paste the key you received earlier upon completing the Maltego Evidence installation into the input field.
You are probably in contact with Maltego at this point. Please send them the Hardware-ID that is displayed on the right-hand side. If in doubt, which one to use, please use the "Mac-Address". An activation key will be generated specifically for your system. The activation key is a .dat file. Upload the obtained file into the system by clicking on the option "Click or drag file here to upload a new license file" or simply drag the file into this area.
After successfully activating the license on your system, you will see information about your license, including the available number of runners, users, and the license duration. To proceed, click the "Let's start" button.
Using the superuser credentials that you created during the application installation, you can log in to Maltego Evidence.
Now you can start working with Maltego Evidence!
Check out our manual for more information on how to generate users, groups and much more!
PDF Instructions
Below you can download a copy of the instructions above and store it on your machine for convenience.